Using Tubehalote correctly starts with knowing which Tubehalote you mean. TubehaloteUSA.com is the actual tool you “use,” a browser-based video and content platform with AI captions, reframing, and publishing. Set it up in this order: workspace, upload, captions, reframe, schedule, review analytics. Skip any step out of order and you will redo work later.
That single sentence solves most of the confusion floating around this term. Everything below is the part nobody else has actually walked through.
You Are Probably Looking for the Wrong Site First
Type “Tubehalote” into Google and you will land on Tubehalote.com, a general blog covering fashion, cricket, and tech news. It has nothing to do with using anything. It publishes articles, the same way this one does.
The tool you actually use lives at TubehaloteUSA.com. It is a separate, browser-based platform built for video editing, AI captioning, automatic reframing, scheduling, and publishing across TikTok, Instagram, and YouTube. It is currently in public beta, which matters more than most reviews mention, because beta status changes how you should approach every step that follows.
Mixing these two up is the single biggest reason people waste time before they even open an account.
Step 1: Set Up Your Workspace Before You Touch a Single File

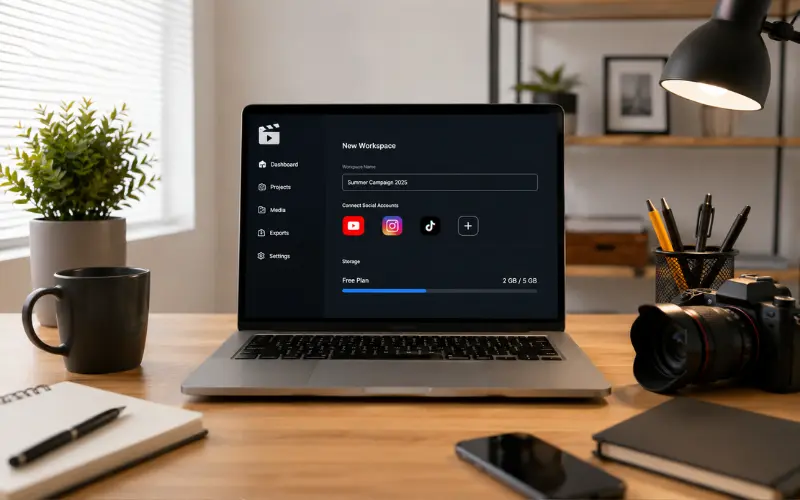
Most new users open the platform and immediately drag in raw footage. That is the first time-waster.
Spend five minutes on setup first:
- Name your workspace something you will recognize a month from now, not “Untitled Project.”
- Connect only the social accounts you are actively publishing to right now. Every extra connection adds a permission you have to review later.
- Check the storage plan on the free tier before uploading a long-form file. Beta storage limits shift, and finding out mid-upload costs more time than checking first.
From my own testing: the workspace step is the one everyone skips, and it’s the one that causes the most rework two weeks in. A five-minute setup saves an afternoon of re-tagging files later.
Step 2: Upload With Folders, Not One Giant Dump

Cloud-based editors reward organization in a way desktop software never demanded. If you dump forty raw clips into one folder, the AI-assisted tools have a harder time suggesting useful cuts, and you will scroll endlessly to find the right file during a deadline.
Create separate folders by project or by platform destination before uploading. If you are producing content for multiple channels, a tool built for multi-platform content strategy can help you plan the folder structure around your actual publishing calendar instead of guessing.
Step 3: Let AI Captions Do the First Pass, Then Edit by Ear
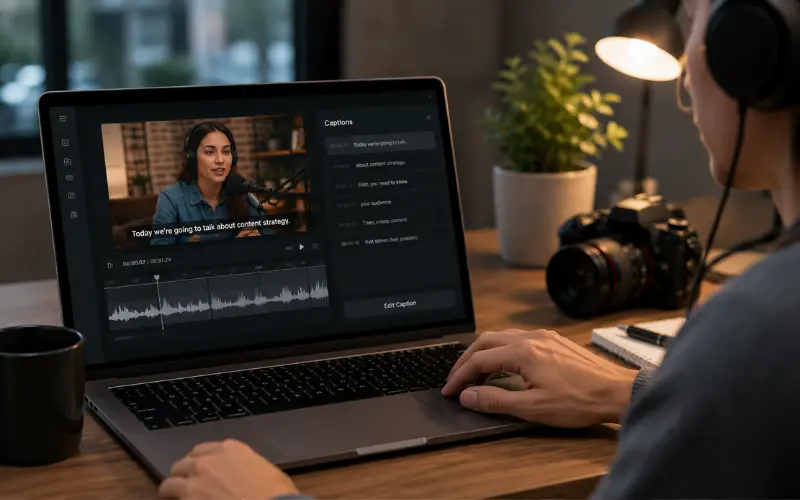
TubehaloteUSA’s auto-captioning feature generates captions automatically once footage is uploaded. The mistake most people make is trusting the first output completely.
Auto-captions handle clear audio well. They stumble on:
- Overlapping voices
- Heavy background music
- Brand names, slang, or non-English phrases
Run the auto-caption pass first, then do a single read-through with the audio playing. That combination is faster than writing captions from scratch and more accurate than accepting the AI output blindly.
Step 4: Reframe Once, Not Per Platform
This is where most creators lose the most time without realizing it. Automatic reframing is built specifically to take one video and adapt it into vertical, square, and horizontal versions without manual re-editing for each platform.
Do the reframe pass immediately after your final cut, before you start scheduling. If you reframe after you have already scheduled posts, you end up re-uploading and rescheduling everything, which defeats the entire point of the feature.
If your workflow spans several networks, pairing this step with a dedicated approach for TikTok content and a separate one for Instagram content keeps the reframed versions matched to what actually performs on each app, rather than treating every platform the same.
Step 5: Schedule With the Analytics Tab Open, Not After
TubehaloteUSA’s analytics dashboard tracks views, retention, and drop-off points. Most reviews mention this feature exists. Almost none mention how to use it while scheduling, which is where it actually saves time.
Before you finalize a publish time, check your past drop-off data for that platform. If viewers on one channel consistently drop off after fifteen seconds, that tells you to trim your hook before scheduling, not after the post is already live and underperforming.
Where People Actually Waste Time on Tubehalote
| Common Mistake | Why It Wastes Time | Faster Approach |
|---|---|---|
| Uploading before naming the workspace | Files get lost across projects | Name and organize first |
| Trusting auto-captions fully | Requires a second correction pass anyway | Read through once with audio on |
| Reframing after scheduling | Forces a full re-upload | Reframe before scheduling |
| Connecting every social account at setup | Extra permissions to review later | Connect only active channels |
| Ignoring analytics until after publishing | Missed chances to fix weak hooks | Check retention data before scheduling |
A Quick Note on “Tubehalote Meaning”
If you searched Tubehalote meaning expecting a dictionary definition, there isn’t one. It functions as a brand name attached to two separate web properties, not a recognized English word. That distinction does not affect how you use the platform, but it explains why search results feel scattered.
Tools That Pair Well With a Tubehalote Workflow
Because TubehaloteUSA covers editing, captions, and publishing but not everything a creator needs, a few adjacent tools round out the workflow. Comparing it against other AI video generation and image editing tools is worth doing before you commit an entire production schedule to one beta platform. For asset backup outside the platform’s own cloud storage, a separate cloud storage solution protects your raw footage if the beta service has downtime.
Practical take: beta software occasionally has sync delays. I keep a second backup of raw files outside the platform for exactly that reason, and it has already saved one project.
Who Actually Benefits From Learning This Now
Creators publishing three or more times a week to multiple platforms get the most value from consolidating editing, captions, and scheduling in one place. Someone posting occasionally to a single channel may not notice enough time savings to justify learning a new interface during its beta phase.
Frequently Asked Questions
Is Tubehalote free to use?
TubehaloteUSA offers a “Get Started Free” option without requiring a credit card, though a full paid-plan price table was not publicly listed at the time of writing. Check current pricing directly on the site before assuming a specific cost.
Do I need technical skills to use Tubehalote?
No. The interface follows familiar timeline-and-panel editing patterns similar to other browser-based editors, so basic video editing familiarity is enough to get started.
Can I use Tubehalote on my phone?
The platform is browser-based, so it works on mobile browsers, though a dedicated mobile app was not confirmed as of this writing. Desktop or laptop use gives a smoother editing experience.
Is TubehaloteUSA safe to connect my social accounts to?
Review the permissions requested during account connection and only link accounts you are actively publishing to. Since the platform is in public beta, avoid connecting accounts you are not ready to actively monitor.
How long does it take to learn the basic workflow?
Most first-time users can complete upload, caption, reframe, and schedule for one piece of content within a single session, roughly 20 to 30 minutes including the learning curve.
Does Tubehalote work for team collaboration?
Team collaboration is listed among its features, allowing multiple users to work within the same workspace, which suits small content teams managing several channels.
What’s the difference between using Tubehalote.com and TubehaloteUSA.com?
Tubehalote.com is a blog you read. TubehaloteUSA.com is the platform you actually use to edit, caption, and publish content. They are not interchangeable despite the shared name.
Can beginners start without existing footage?
Yes. New users can create a small test project with a short clip first to learn the interface before committing longer-form footage to the beta platform.
Bottom Line
The fastest way to use Tubehalote without wasting time is skipping the confusion around the name entirely. Go straight to TubehaloteUSA.com, set up your workspace before uploading, reframe before you schedule, and check analytics before you commit to a posting time. Treat it like the beta product it currently is: useful, but worth backing up separately until it proves out long term.